


The Spa-Level Facial You Can Crush At Home
If your skin is feeling a bit ‘meh’ but you’ve neither the time nor the energy to hit up your go-to skincare guru, it’s time to amp up your at-home facial skills.
Nothing beats the feeling of indulging your skin for an hour at the hands of a true professional. Whether you’re a chemical peel lover, a microdermabrasion fan or a lymphatic drainage facial kinda girl, having someone else dedicate their time to improving the quality and health of your skin? That’s priceless.
But if only things were that simple. Life, work, finances, even the world (here’s looking at you, Covid-19) can often get in the way of your monthly me-time. And that’s kind of annoying. The good news is there is something you can do about it… and all in the comfort of your own home. We’re not saying you can take the place of a truly qualified facialist, dermatologist or esthetician – far from it – but once a week, set aside some quality time out, then arm yourself with the right intel and some clinically-proven skincare products and it’s possible to recreate a spa-level facial in no time.
Here's how.
Step 1: Set The Mood
Slapping a sheet mask on your face while rushing around doing the laundry does not make for the most ideal moment of zen. And we know you know that, so why don’t you put it into practice? Ever been to see a beauty therapist only for her to stop half-way through your HydraFacial to check her Insta feed? Thought not.
So, to create the perfect setting for your at-home pampering sesh, make sure you treat it as if it were a true professional job. First up, put your phone away, set aside an hour and tell anyone you live with – roommates, S.O.s, family, whoever – to leave you alone. End of.
Next, choose some relaxing beats, light a candle or two, pop on a clean fluffy bathrobe, wash your hands (important) and get ready for the real deal. Better still, have a pre-facial soak in a warm, lavender oil-infused bath. Now, we’re talking.
And if this all sounds too much like frivolous nonsense, remember, it’s not. Setting the perfect scene is vital for helping you to relax, de-stress and give you the right frame of mind to concentrate on what matters: your complexion, not your chores.

Photo by cottonbro from Pexels
Step 2: Deep Cleanse
Clean, perfectly prepped skin is the only way to start, so choose a gentle cleanser that has your skin type written all over it. Not sure of your skin type? Then think about how it feels after you’ve cleansed and left your skin free of product or makeup for a few hours. If it feels greasy and looks shiny, it’s most probably oily, whereas if it feels tight, it’s dry. If it’s a bit of both, then it’s combination and if it’s neither one nor the other, then lucky you, you probably have normal skin.
Great cleansing takes a little time, so don’t just slap water and cleanser on your face then hope for the best. Instead, take a minute or two to massage your skin with the pads of your fingers as you work the cleanser into your face and neck. Focus on areas of excess oil or congestion, but be extra gentle around your eyes to avoid tugging the skin in this thin, delicate area.
All this takes a matter of minutes but will help boost circulation, remove toxins and give you the perfect canvas to continue to the next step.
Step 3: Let Off Steam
Back in grandma’s day, steaming was everything and while we love exciting new beauty tools and modern techniques, sometimes the old tricks are the best ones. Even better news? Steaming is something everybody can do, for literally zero dollars.
Steaming is one of the most beneficial skincare tricks for boosting circulation, softening the skin, opening your pores and loosening trapped oil and debris. The heat also makes you sweat, which further promotes a good clear-out of unwanted toxins. Just remember to leave the extractions to the pros to prevent damaging your skin. It’s honestly not worth it, people.
For the perfect steam, simply fill a sink or bowl with hot water, then cover your head with a towel and hover your face about 12 inches above the water for 10 minutes to trap the steam in. You could even add some fresh herbs, essential oils or tea to the water to help detoxify or soothe your skin. To finish, gently pat your face dry with a clean towel, then tone your skin to cool and whisk away all those impurities the steam has loosened from your pores.
Important note: super-hot temperatures cause the blood vessels in your skin to dilate which leads to redness and flushing. Therefore, if you suffer with dryness or sensitivities like eczema or rosacea you might want to give this step a miss.
Step 4: Time To Exfoliate
Ever had a facial that didn’t involve some kind of exfoliation? Us neither because little beats it for sloughing away dead skin cells and accelerating cell turnover – the key to a glowing, healthy complexion.
Don't get us wrong, physical exfoliators can be super-effective if they're gentle and avoid using nasty things like ground nutshells to scrub and often damage the skin. But here at TruSkin, we believe chemical exfoliators are superior.
Chemical exfoliators harness the power of active ingredients such as alpha hydroxy acids (AHAs) or beta hydroxy acids (BHAs) to ditch dead skin and encourage the fresh new stuff to take its place. Spend a couple of minutes after steaming to massage a gentle chemical exfoliant all over your face and this will really help leave it polished and clean.
Rushed for time? Then our Daily Super Toner, which contains glycolic acid (an AHA) will take care of business in seconds.

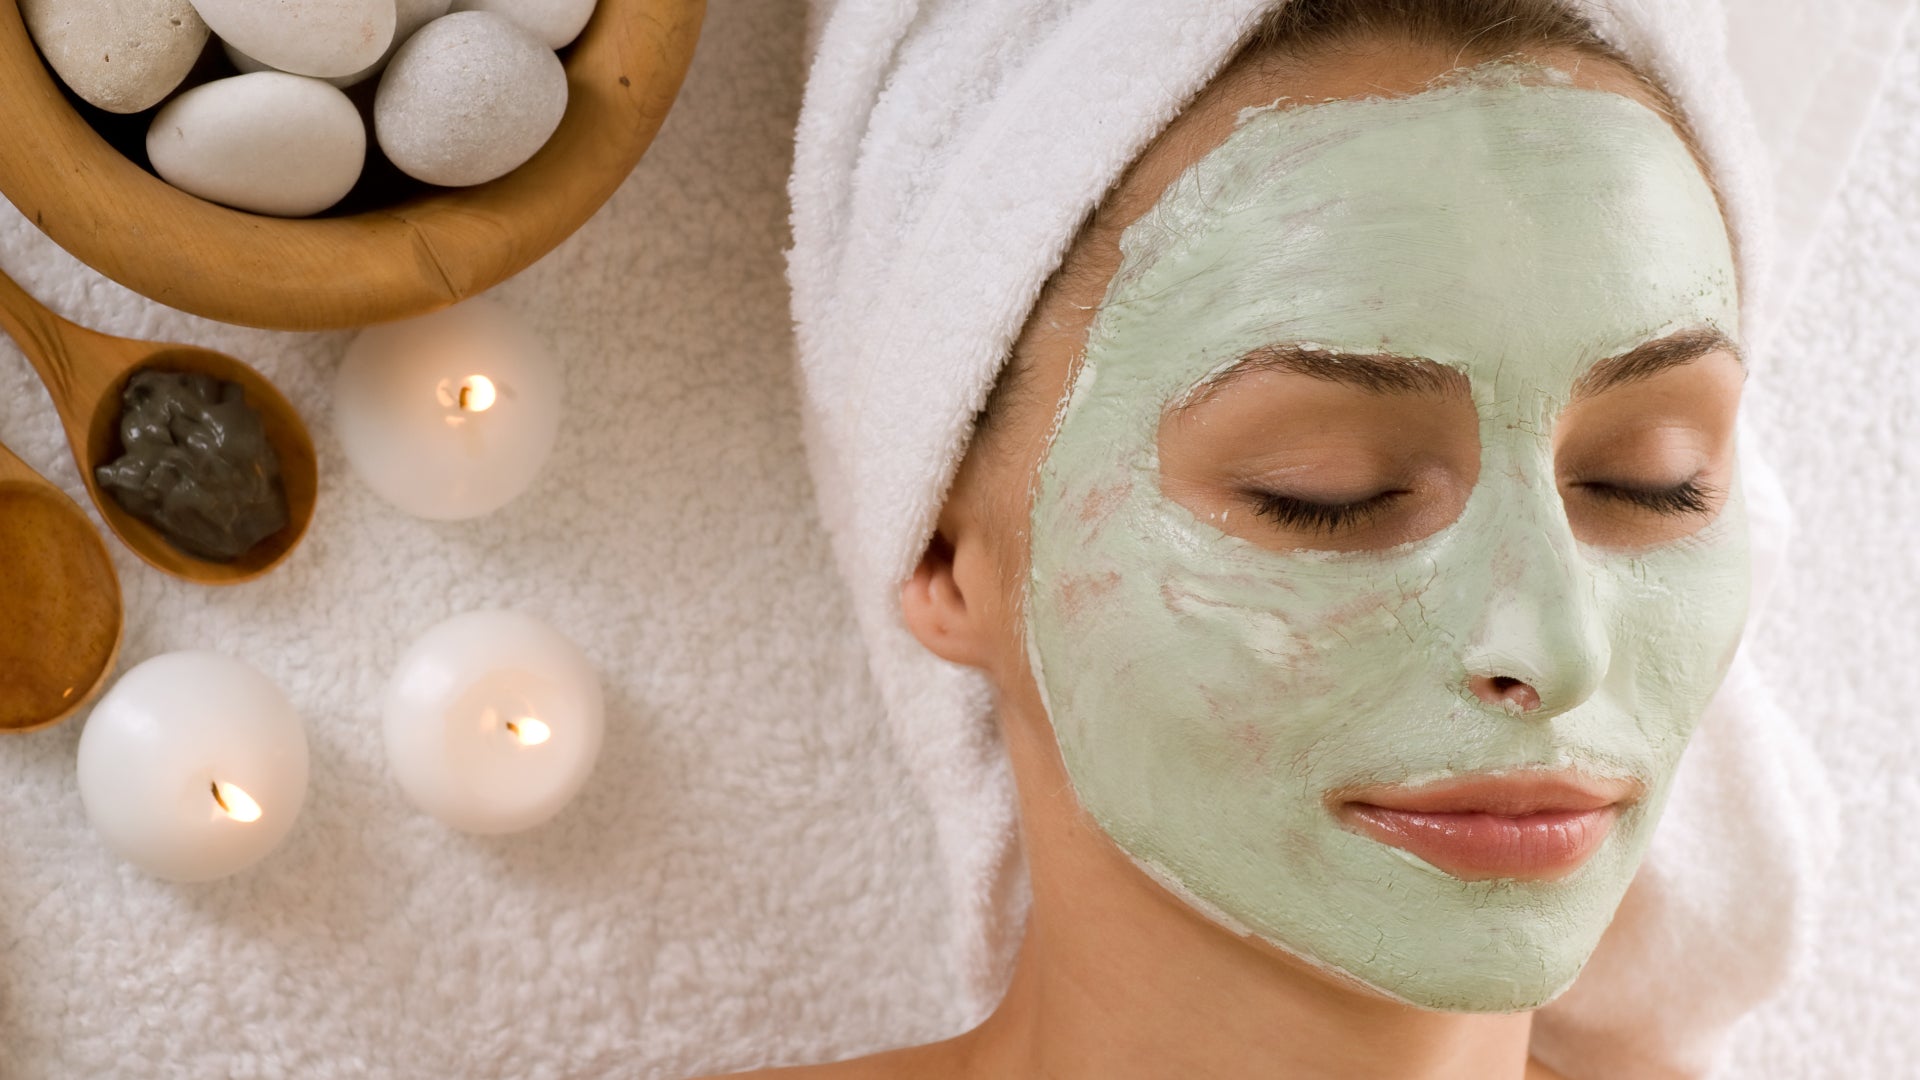
Step 5: Master A Mask
Now for the best bit when you can apply a face mask and become horizontal for 10 minutes (ssh, don’t tell your kids/roomie/lover).
Masks come in many different guises, so the only piece of advice we have here is to choose yours wisely, depending on your skin type or concerns, and avoid anything that’s brimming with alcohol or other skin irritants.
Clay and charcoal are awesome ingredients to look out for if you have oily or acne-prone skin as these are super-effective at detoxifying and cleaning out your pores. If you feel like your skin needs a serious hydration boost, however, try masks that contain vitamin E, B5 or aloe vera. And if you want to help reduce the signs of aging such as fine lines or pigmentation? Then go for mask that’s been formulated with antioxidants like vitamin C. It’s literally the best.
Step 6: Treat And Moisturize
The best way to finish any type of facial is with a carefully curated serum and moisturizer combo to lock in all that good work you’ve just done. You’ve got this, we’re confident of that, but to remind you, look for formulations that contain hyaluronic acid which is one of the most effective moisturizing ingredients out there and ideal for all skin types.
Your serum should be applied first, then leave it a minute or so (time to pour a glass of wine, maybe?) before applying moisturizer. Again, spend a few moments massaging your face and neck as you moisturize to help de-puff the skin while boosting circulation and collagen production. You could even invest in a jade facial roller if you’re feeling really fancy;)
And you're done.
You May Also Like
View More-
![Why A Solid Routine Is The Key To Your Best Skin Ever]()

Because if your routine is all over the place, your skin could easily end up in the exact same boat.
Do you love your skin? And we’re not talking about your so-called imperfections because you’d be kind of weird if you truly loved your dark spots, lines and pimples. No, what we’re actually talking about is your skin as a whole. That massive and super important organ which accounts for around 15 percent of your entire body weight, covers an average of 20 square feet and is your body’s first line of defense against the world and everything it throws at you.
Understanding your skin and coming to terms with the fact that it may not be what it used to be is the first step to loving your complexion. And the second? Working diligently every single day to help protect, treat and maintain what you now have.
We believe that looking after your skin with a consistent regime is the single most important way to help balance your skin, prevent acne, treat dryness, reduce the visible effects of aging and so on and so forth. By sticking to a routine that includes gentle cleansing, targeted treatments, smart moisturizing and, of course, that all-important sun protection, you can rest assured you’re doing everything you can to manage the effects of time. And by doing this you automatically maximize your skin’s full potential. Which is all you can ask for, right?
So, how do you know what’s the correct routine for you? Well, first you need to understand your skin type.
What’s Your Skin Type?
Sure, you may have days when your skin feels oilier than others, but do you honestly have oily skin? And yes, your skin may feel a little irritated sometimes (don’t we all!), but is it genuinely sensitive?
To work out your true skin type, wash your face with a mild cleanser, then pat it dry and leave it completely bare for an hour or so. After this time, study it in the mirror and feel it with clean hands. If it feels tight and a little itchy it’s dry; if it looks shiny and feels greasy – especially around your t-zone – it’s oily; if it’s a bit of both it’s combination and if it looks the same as it did an hour ago – ie: peachy keen – then we hate you (jokes) because you’ve been blessed with the much-coveted normal skin.
Once you know your skin inside out, you can then tailor a smart routine that caters for both your skin type and your current concerns. Trust us, this knowledge is worth its weight in gold.
How To Build An Awesome Skincare Routine
Here’s how to nail the five most important steps…
1. Cleansing
No matter your skin type, gentle is always the way to go when it comes to cleansing your skin. Choose products that are free of irritating ingredients like sulfates, phthalates, silicones and bad alcohols, and make sure you cleanse every morning and night – without fail. Your skin is subject to all manner of toxins, chemicals and pollution throughout the day, not to mention the natural oils and sweat that blend with your makeup and build up on the surface of your skin. All this simply has to go before turning in for the night if you want to keep your skin clean, clear and healthy.
When you cleanse, use lukewarm water only as hot water could cause redness and irritation. Massage your face and neck (don’t forget your neck, people) using the pads of your fingers to boost blood flow and lymphatic drainage, then rinse thoroughly and pat dry with a clean towel. That communal hand towel the whole family uses to dry their hands? Unacceptable for the delicate skin on your face.
2. Toning
After cleansing, don’t forget to spritz your skin with toner. Long gone are the days when toners stripped your skin of every last drop of oil, claiming to be the cat’s whiskers for getting rid of acne spots but often making matters worse. Nowadays, toners are formulated to flood your skin with hydration, antioxidants, minerals, peptides, exfoliating acids, the works.
Even the most sensitive of skin can benefit from toner. Take our Rose Water Refreshing Facial Toner, for example. This 100 percent pure and natural Moroccan rose water gently balances, hydrates, calms and heals the skin, making it ideal for all skin types, but particularly great for irritated skin.
Simply mist it all over your skin immediately after cleansing. So easy, but so effective.

3. Treating
Now’s the time to apply your eye treatment and serum. Serum should come first, straight after toning, and remember, less is more. Apply just one or two drops to your fingers, then smooth or press it all over your face and neck. Take care not to massage it in too much as serums are formulated to penetrate your skin without too much effort on your behalf.
Think about what niggles you about your complexion and choose your serum accordingly. Are you concerned with dehydration? Then something with hyaluronic acid or glycerin should be your first port of call. Perhaps you want to target the visible signs of aging. Then you can’t go wrong with retinol. Or maybe your skin is looking dull and you want to up your radiance game. Say hello to vitamin C. We have a whole team of serums just waiting to help deal with your skin woes. You’re welcome.
After applying your serum, allow it to settle for a few minutes while applying an eye cream or gel to moisturize this notoriously dry area and target issues like dark circles or puffiness. The skin around your eyes is around 10 times thinner than the rest of your face, so avoid applying your regular moisturizer here – it could overload the skin and cause irritation or bags.
Again, a tiny amount of eye treatment is plenty, so dispense just one pump between the pads of your ring fingers, then dab it gently all around your eyes, taking care not to apply too much pressure or drag the skin. Big no-no, right there.
4. Moisturizing
Give your serum and eye treatment another minute to settle before applying the next stage in your awesome routine: moisturizer. This will help avoid pilling – those annoying balls of product that build up on the surface of your skin.
Your moisturizer should be formulated with a blend of humectants (to hydrate) plus emollients and/or occlusives (to smooth and seal in moisture) and should be targeted to your specific skin type. Look out for oil-free, gel formulations if your skin is super oily, and richer butters or balms if you’re extremely dry.
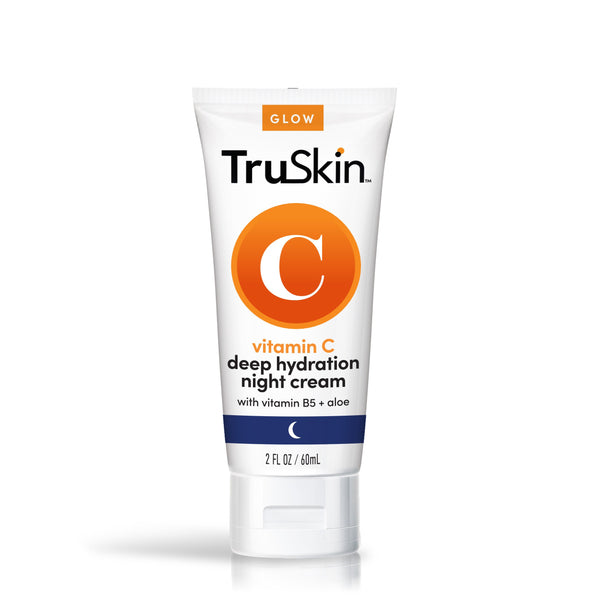
Lotions and creams are ideal for normal or combination skin types, but if they’ve been formulated cleverly they can be great all-rounders for all. Our Vitamin C Brightening Moisturizer, for example, is an awesome choice for hydrating, moisturizing, brightening and protecting most skin types. Same goes for Vitamin C Deep Hydration Night Cream.
Apply a dime-sized amount all over your face and neck, using the palms of your hands. Start either side of your nose and sweep it out towards the hairline. Repeat this a few times, then work in the same motions over your forehead, chin, jawline and neck.

5. Protecting
Your nighttime regime is now complete. Not so for the morning because there’s one vital component missing here: sun protection. Of course, great serums and moisturizers will be packed with antioxidants to help protect your skin from sun-induced free radical damage, but you must further protect it with a broad-spectrum sunscreen every day of the year: rain or shine.
Unlike the rest of your regime, sun protection is not something you can afford to scrimp on. The Skin Cancer Foundation recommends a good nickel-sized dollop for your face, so don't be tight and apply it evenly and generously.
Now, Stick With It, People
You know your skin type, you’ve pinned down an awesome routine, now all that’s left to do is to stick with it. Of course, the odd lazy evening when you’re too tired to spend 10 minutes on your skin is OK, but try to keep up with a consistent routine as much as you can. And no matter how tired you are, at least cleanse and moisturize your precious skin before bed.
Your skin will thank you for it, we promise.
Why A Solid Routine Is The Key To Your Best Skin Ever
read more -
![Why A New Year Calls For New Skin]()
A brand new year means it’s out with the old and in with the new. Skin that is.
‘New’ skin might sound like a fantasy, but there’s actually some truth in the idea of new and old skin… and yes, you can absolutely enhance your newest skin cells while nudging the old ones to politely get out of town.
Here’s the thing about your skin – it’s regularly exposed to the slings and arrows of the environment which means it needs to constantly regenerate to ensure it functions to the best of its ability. And its functions are vital. Among other things on its huge resumé are things like regulating your body’s internal temperature, protecting your internal organs, preventing serious injury and shielding you from harmful things like extreme temperature, toxins and nasty germs. No biggie, right? Ha, au contraire. Without your skin, you would literally cease to exist. End of.
So, What Does Skin Regeneration Mean?
Well, it’s pretty simple. Skin cells are created… and then they die, becoming nothing but dust on your baseboards. You actually lose between 30,000 and 40,000 skin cells every minute (*immediately vacuums entire house from top to bottom). Yes, this means skin cell regeneration is a massive operation.
The science is as follows. Your skin is comprised of three main layers. Starting at the base you’ve got the hypodermis (AKA the subcutaneous layer) which consists mainly of fatty tissue and attaches your skin to the muscles and tissues below to provide essential insulation and cushioning. Then, you have the dermis which is where all the action takes place. Collagen and elastin fibres are produced in the dermis, alongside your sebaceous glands, blood vessels, hair follicles, nerve ending and sweat glands.
Finally, on the surface is the protective but paper-thin epidermis. This is the bit you see and it gives your skin its color while keeping water in and toxins out.
It’s here at the epidermis that your visible skin cells are created and get slowly pushed to the surface as they get harder, flatter and drier. Once they arrive at the uppermost layer – the stratum corneum if you want to get fancy – these cells die, shed and are immediately replaced by new skin cells going through the exact same process right behind them. This cycle takes between around four or five weeks in an average, middle-aged adult.
What Happens To The Life Cycle Of Your Skin As You Age?
One guess: it slows down. Big surprise, right? While the average life cycle of a skin cell is around 28 days during your 30s, once you get past 40 and into your 50s it slows down to around 50-60 days. It can even last as long as 90 days after the age of 60 which is why your skin becomes less bright, fresh, soft and supple as you age. For the most part, your genes determine the life cycle of your own personal skin cells, but things like sun damage, pollution, a poor diet, stress and a cruddy skincare routine will also have a big impact on the rate at which your skin turns over.
And this is where you come in…
3 Of The Best Ways To Embrace Your Newest Skin
Leaving your skin’s natural turnover process to its own devices can spell disaster for the look and feel of your complexion. For one thing, the accumulation of dead skin cells can block your pores and cause breakouts galore. And then there’s the dryness, dehydration and flakiness that come hand in hand with sluggish skin. Oh, and did we mention that allowing dead skin cells to hang around longer than they’re welcome may stop your serum and moisturizer from penetrating your skin, meaning they won’t be able to work to the best of their abilities. Un. Cool.
Here, we round up three tried and trusted ways to boost the turnover of your skin and therefore embrace your best, glowiest (made-up word, right there?), newest skin ever. Happy 2022, everyone!
1. Exfoliate Regularly
Exfoliating your skin with a facial scrub, mitt or cleansing brush is a great way to wake up tired, sluggish skin and boost cell turnover. How so? Because it physically sloughs away any dead skin cells that are holding on to the surface for dear life. It’s as simple as that. Of course, physical exfoliation doesn’t come without its problems. Mainly that some people do it a) too often and b) too aggressively. The key is to go gently; avoid products that contain sharp particles like ground fruit pits or crushed nutshells, and only ever exfoliate once, maybe twice a week.
Work on damp skin and use light strokes and circular motions as you exfoliate for 30 seconds or so. Honestly, that’s really all you should need to keep your cells turning over efficiently.
2. Apply Serums That Naturally Boost Cell Turnover
Face scrubs and physical exfoliators aren’t the only way to reveal new, fresh skin: exfoliating acids also get the job done nicely – and they require no effort on your behalf as an added bonus.
Chemicals exfoliators include ingredients like glycolic, lactic, citric and salicylic acid. Often found in treatment serums, they work by breaking down the bonds that glue dead skin cells together, allowing them to naturally shed without you having to scrub them away. We’re huge fans of exfoliating acids as they offer all the benefits of physical exfoliation, but often with less damage to the surface of your skin – as long as you don’t go overboard, of course.
To ensure you don’t smother your skin with too many acids at once, try one of our carefully curated exfoliating products such as the glycolic acid-infused Ocean Minerals Super Toner or Vitamin C Super Serum+.

3. Don’t Forget Your Retinol
Retinol is another powerhouse skincare ingredient that has an exfoliating effect on the surface of your skin. While it doesn’t slough away skin cells or exfoliate in the same way as scrubs or hydroxy acids (AHAs and BHAs), retinol works by ‘communicating’ with your skin cells, boosting collagen production and encouraging your skin to turn over at a more efficient rate.
Again, if you’re looking to boost your skin’s ‘newness,’ retinol is an awesome choice, but don’t go crazy with it. Retinol is a potent ingredient and should only be used if you’ve patch tested it first, and experienced no unwanted, lasting irritations. And if you’re super sensitive, don’t go scrubbing your face, then applying glycolic acid and retinol all at once. This will do nothing but over-stimulate your skin and break down your important protective barrier which can cause real problems like inflammation, redness, itching, even flare-ups in pre-existing conditions such as acne, eczema, psoriasis and rosacea. Go slowly with retinol, applying it just once or twice a week to start with, then building to nightly as your skin acclimates.

The moral of the story is that yes, you want to embrace and enhance your new skin. But be kind as you do so. Or you might, actually you will, regret it.
Why A New Year Calls For New Skin
read more -
![Why A New Year Calls For New Skin]()
A brand new year means it’s out with the old and in with the new. Skin that is.
‘New’ skin might sound like a fantasy, but there’s actually some truth in the idea of new and old skin… and yes, you can absolutely enhance your newest skin cells while nudging the old ones to politely get out of town.
Here’s the thing about your skin – it’s regularly exposed to the slings and arrows of the environment which means it needs to constantly regenerate to ensure it functions to the best of its ability. And its functions are vital. Among other things on its huge resumé are things like regulating your body’s internal temperature, protecting your internal organs, preventing serious injury and shielding you from harmful things like extreme temperature, toxins and nasty germs. No biggie, right? Ha, au contraire. Without your skin, you would literally cease to exist. End of.
So, What Does Skin Regeneration Mean?
Well, it’s pretty simple. Skin cells are created… and then they die, becoming nothing but dust on your baseboards. You actually lose between 30,000 and 40,000 skin cells every minute (*immediately vacuums entire house from top to bottom). Yes, this means skin cell regeneration is a massive operation.
The science is as follows. Your skin is comprised of three main layers. Starting at the base you’ve got the hypodermis (AKA the subcutaneous layer) which consists mainly of fatty tissue and attaches your skin to the muscles and tissues below to provide essential insulation and cushioning. Then, you have the dermis which is where all the action takes place. Collagen and elastin fibres are produced in the dermis, alongside your sebaceous glands, blood vessels, hair follicles, nerve ending and sweat glands.
Finally, on the surface is the protective but paper-thin epidermis. This is the bit you see and it gives your skin its color while keeping water in and toxins out.
It’s here at the epidermis that your visible skin cells are created and get slowly pushed to the surface as they get harder, flatter and drier. Once they arrive at the uppermost layer – the stratum corneum if you want to get fancy – these cells die, shed and are immediately replaced by new skin cells going through the exact same process right behind them. This cycle takes between around four or five weeks in an average, middle-aged adult.
What Happens To The Life Cycle Of Your Skin As You Age?
One guess: it slows down. Big surprise, right? While the average life cycle of a skin cell is around 28 days during your 30s, once you get past 40 and into your 50s it slows down to around 50-60 days. It can even last as long as 90 days after the age of 60 which is why your skin becomes less bright, fresh, soft and supple as you age. For the most part, your genes determine the life cycle of your own personal skin cells, but things like sun damage, pollution, a poor diet, stress and a cruddy skincare routine will also have a big impact on the rate at which your skin turns over.
And this is where you come in…
3 Of The Best Ways To Embrace Your Newest Skin
Leaving your skin’s natural turnover process to its own devices can spell disaster for the look and feel of your complexion. For one thing, the accumulation of dead skin cells can block your pores and cause breakouts galore. And then there’s the dryness, dehydration and flakiness that come hand in hand with sluggish skin. Oh, and did we mention that allowing dead skin cells to hang around longer than they’re welcome may stop your serum and moisturizer from penetrating your skin, meaning they won’t be able to work to the best of their abilities. Un. Cool.
Here, we round up three tried and trusted ways to boost the turnover of your skin and therefore embrace your best, glowiest (made-up word, right there?), newest skin ever. Happy 2022, everyone!
1. Exfoliate Regularly
Exfoliating your skin with a facial scrub, mitt or cleansing brush is a great way to wake up tired, sluggish skin and boost cell turnover. How so? Because it physically sloughs away any dead skin cells that are holding on to the surface for dear life. It’s as simple as that. Of course, physical exfoliation doesn’t come without its problems. Mainly that some people do it a) too often and b) too aggressively. The key is to go gently; avoid products that contain sharp particles like ground fruit pits or crushed nutshells, and only ever exfoliate once, maybe twice a week.
Work on damp skin and use light strokes and circular motions as you exfoliate for 30 seconds or so. Honestly, that’s really all you should need to keep your cells turning over efficiently.
2. Apply Serums That Naturally Boost Cell Turnover
Face scrubs and physical exfoliators aren’t the only way to reveal new, fresh skin: exfoliating acids also get the job done nicely – and they require no effort on your behalf as an added bonus.
Chemicals exfoliators include ingredients like glycolic, lactic, citric and salicylic acid. Often found in treatment serums, they work by breaking down the bonds that glue dead skin cells together, allowing them to naturally shed without you having to scrub them away. We’re huge fans of exfoliating acids as they offer all the benefits of physical exfoliation, but often with less damage to the surface of your skin – as long as you don’t go overboard, of course.
To ensure you don’t smother your skin with too many acids at once, try one of our carefully curated exfoliating products such as the glycolic acid-infused Ocean Minerals Super Toner or Vitamin C Super Serum+.
3. Don’t Forget Your Retinol
Retinol is another powerhouse skincare ingredient that has an exfoliating effect on the surface of your skin. While it doesn’t slough away skin cells or exfoliate in the same way as scrubs or hydroxy acids (AHAs and BHAs), retinol works by ‘communicating’ with your skin cells, boosting collagen production and encouraging your skin to turn over at a more efficient rate.
Again, if you’re looking to boost your skin’s ‘newness,’ retinol is an awesome choice, but don’t go crazy with it. Retinol is a potent ingredient and should only be used if you’ve patch tested it first, and experienced no unwanted, lasting irritations. And if you’re super sensitive, don’t go scrubbing your face, then applying glycolic acid and retinol all at once. This will do nothing but over-stimulate your skin and break down your important protective barrier which can cause real problems like inflammation, redness, itching, even flare-ups in pre-existing conditions such as acne, eczema, psoriasis and rosacea. Go slowly with retinol, applying it just once or twice a week to start with, then building to nightly as your skin acclimates.
The moral of the story is that yes, you want to embrace and enhance your new skin. But be kind as you do so. Or you might, actually you will, regret it.
Why A New Year Calls For New Skin
read more


